CloudFront FunctionsはAWSがリリースした新しいエッジコンピューティングサービスです。CloudFrontが利用している200を超えるエッジロケーションにてコードが実行でき、ヘッダーの追加や簡単なリダイレクトなどを実装することができます。

このCloudFront Functionsのデプロイ・テスト・リリース自動化をCircleCIで実行できるサンプルを作成しましたので紹介します。
ソースコード (GitHub)
ソースコードはGitHubに公開しています。
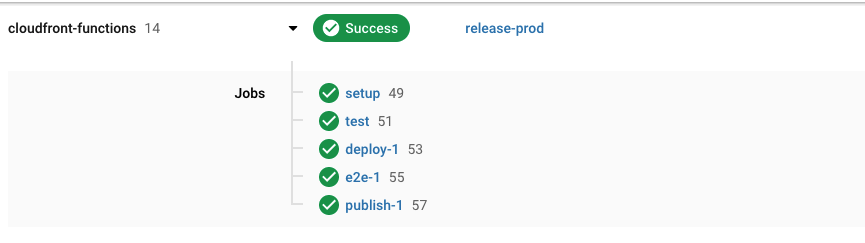
テンプレートで実装したワークフロー
このサンプルプロジェクトは3種類のブランチに対応しています。
- mainブランチ: 本番環境用Functions管理ブランチ
- development: 開発環境用ブランチ
- その他: CDKのユニットテストのみ実施するブランチ
developmentブランチでリリース予定の機能の実装やCloudFrontに適用しての動作確認を実施し、mainブランチにマージすることで本番環境で稼働しているCloudFrontに設定されたFunctionsを更新する流れを想定しています。
Tips: CloudFront Functionsのリソース定義について
CloudFront Functionsを作成・更新する方法はいくつかありますが、このテンプレートではAWS CDKを利用しています。
CloudFormationでもリソースの定義は可能ですが、こちらの場合YAMLまたはJSONにFunctionsのコードを書く必要が出てきます。
AWSTemplateFormatVersion: '2010-09-09'

Resources:
  MyFunction:
    Type: AWS::CloudFront::Function
    Properties:
      Name: cfn-examples
      FunctionConfig:
        Comment: "Example"
        Runtime: cloudfront-js-1.0
      AutoPublish: true
      FunctionCode: |
        function handler(event) {
            var request = event.request;
            return request;
        }
module.exportsがFunctionsのランタイムでサポートされていない関係で、ユニットテストを実行することが難しいため、YAMLに書いてしまう形でも支障はないのですが、IDEでの見栄えや入力補完があったほうが嬉しいことなどからCDKを採用しました。
import { CfnFunction } from '@aws-cdk/aws-cloudfront';
import * as cdk from '@aws-cdk/core';
import { readFileSync } from 'fs';
import { join } from 'path';

export class CloudfrontFunctionsStack extends cdk.Stack {
  constructor(scope: cdk.Construct, id: string, props?: cdk.StackProps) {
    super(scope, id, props);
    new CfnFunction(this, 'ViewerResponseFunction', {
      name: 'ExampleViewerResponseFunction',
      autoPublish: false,
      functionCode: readFileSync(
         join(__dirname, '../functions/viewer_response.js'),
         { encoding: 'utf-8' }
      ),
      functionConfig: {
        comment: "Comment about the function",
        runtime: 'cloudfront-js-1.0',
      }
    })
  }
}
なお、terraformの場合もファイルから読み込みができる様子です。
resource "aws_cloudfront_function" "example" {
  name    = "example"
  runtime = "cloudfront-js-1.0"
  comment = "example function"
  publish = true
  code    = file("${path.module}/function.js")
}
補足:AWS CDKのアップデートでfromFileがサポートされる模様
このテンプレートを作成していた時点では、自力でファイルからコードを読み込む必要がありました。しかしGitHubを見ると、FunctionCode.fromFileメソッドが新規追加されてる様子です。
Additionally, you can load the function’s code from a file using the
https://github.com/aws/aws-cdk/pull/14980FunctionCode.fromFile()method.
バージョンv1.109.0以降では、上記のサンプルよりもFunctionCode.fromFileメソッドを使うパターンを利用することをお勧めします。実態はほぼ同じですが、こちらの方がコードがシンプルになります。
autoPublishをfalseにすることで、リリース事故を予防する
AWS CDKまたはCloudFormationを利用している場合、autoPublish(terraformはpublish)をtrueにするとデプロイしたコードが即時にCloudFront側へ反映されます。これはLambda@edgeのようにCloudFront.UpdateDistribution APIを利用する手間がなくなりとても便利な機能ですが、管理対象のCloudFrontが多い場合や、コードの変更内容が大きい場合にはすこしリスクにもなります。
CloudFront Functionsのコードは、YAMLに直接記述するか、.jsファイルに記述していても、module.exportsが利用できないため、webpackなどでうまくコードの整理をしてやらないとユニットテストを実行することができません。そのため、CloudFront.TestFunctionAPIまたは管理画面のTest タブで動作確認を行う必要があります。
TestFunctionを実行してから変更を反映したい場合、autoPublishをfalseに設定し、テストが終わってからCloudFront.PublishFunction APIで変更の反映を行うことをお勧めします。
今回のテンプレートでは、autoPublishをfalseに設定し、CirlceCIのワークフローで別途E2Eテストと公開ジョブを実行する手法を採用しています。
意図せぬコードや設定変更を防ぐため、JestのSnapShotTestで変更を検知する
AWS CDKを利用した場合、定義した内容をSynthUtils.toCloudFormationを利用してCloudFormationのJSONコード化することができます。
import { SynthUtils } from '@aws-cdk/assert';
import '@aws-cdk/assert/jest';
import * as cdk from '@aws-cdk/core';
import * as CloudfrontFunctions from '../../lib/cloudfront-functions-stack';

describe('unit test for the stack', () => {
  let app: cdk.App
  let stack: cdk.Stack
  beforeEach(() => {
    app = new cdk.App();
    stack = new CloudfrontFunctions.CloudfrontFunctionsStack(app, 'MyTestStack');
  })
  test('Should match snapshot', () => {
      expect(SynthUtils.toCloudFormation(stack)).toMatchSnapshot()
  });
...
このJSONに対して、JestのtoMatchSnapshotを実行することで、コードの内容やautoPublish、ランタイムなどの設定が意図せずに変更されていないかを検知することができるようになります。
  ● unit test for the stack › Should match snapshot

    expect(received).toMatchSnapshot()

    Snapshot name: `unit test for the stack Should match snapshot 1`

    - Snapshot  - 2
    + Received  + 1

    @@ -1,10 +1,10 @@
      Object {
        "Resources": Object {
          "ViewerRequestFunctiondevelopment": Object {
            "Properties": Object {
    -         "AutoPublish": false,
    +         "AutoPublish": true,
              "FunctionCode": "function handler(event) {
          var request = event.request;
          return request;
      }",
              "FunctionConfig": Object {
    @@ -22,11 +22,10 @@
          var response = event.response;
          // Set HTTP security headers
          response.headers['strict-transport-security'] = { value: 'max-age=63072000'};
          response.headers['x-content-type-options'] = { value: 'nosniff'};
          response.headers['x-frame-options'] = {value: 'SAMEORIGIN'};
    -     response.headers['x-xss-protection'] = {value: '1; mode=block'};
          return response;
        }",
              "FunctionConfig": Object {
                "Comment": "Add easing security header and set redirection of s3 object uuid removing",
                "Runtime": "cloudfront-js-1.0",

      12 |   })
      13 |   test('Should match snapshot', () => {
    > 14 |       expect(SynthUtils.toCloudFormation(stack)).toMatchSnapshot()
         |                                                  ^
      15 |   });
      16 |   it('should have CloudFront Function resources', () => {
      17 |     expect(stack).toHaveResource( "AWS::CloudFront::Function")

      at Object.<anonymous> (tests/unit/cloudfront-functions.test.ts:14:50)

 › 1 snapshot failed.
Snapshot Summary
 › 1 snapshot failed from 1 test suite. Inspect your code changes or run `yarn test -u` to update them.

Test Suites: 1 failed, 1 total
Tests:       1 failed, 5 passed, 6 total
Snapshots:   1 failed, 1 total
Time:        3.167 s, estimated 11 s
この例では、ViewerRequestFunctiondevelopmentのAutoPublishがtrueに変更されており、ViewerResponseFunctiondevelpomentのコードからx-xss-protectionヘッダーを追加する処理が消されていることがわかります。
Inspect your code changes or run yarn test -u to update them.と書かれているように、これらの変更が意図したものである場合は、yarn test -uを実行することで、スナップショットを更新することができます。裏返すと、CIサービス上でこのテストがFailした場合、誰かが意図せぬ設定変更をコミットしてしまった可能性が高いと考えることができます。
コードのユニットテストを行うことは困難ですが、スナップショットテストを利用することで、「意図しない変更が混ざっているか否か」については素早く検知することができるようになります。
「JavaScriptが書けすぎる」問題もユニットテストでフォローする
CloudFront Functionsでエラーを出しやすい理由のTOP3はconst , let, module.exportsだと個人的に考えています。JavaScriptがある程度かける人は、変数定義の際に手癖のようにconstまたはletを使うでしょうし、ユニットテストを書きたい欲求が湧くとmodule.exportsで関数をJestからimportできるようにします。
しかしこれらをFunctionsのランタイムはサポートしておらず、使用するだけでCloudFrontがHTTP500を返すようになります。
CloudFront Functionsだけ実装する仕事になれば、慣れで解決できる問題だと思いますが、現実問題としてそうなることはかなり稀です。そのため、手癖で利用してしまいがちな構文についても、Jestのテストで確認するようにしています。
  it('should not contain module.export on the functionCode', () => {
    const resources = Object.values(SynthUtils.toCloudFormation(stack).Resources)
      .filter((resource: any) => resource.Type === "AWS::CloudFront::Function" )
    resources.forEach((resource: any) => {
      expect(resource.Properties.FunctionCode).not.toContain('module.exports')
    })
  })
  it('should not contain const on the functionCode', () => {
    const resources = Object.values(SynthUtils.toCloudFormation(stack).Resources)
      .filter((resource: any) => resource.Type === "AWS::CloudFront::Function" )
    resources.forEach((resource: any) => {
      expect(resource.Properties.FunctionCode).not.toContain('const')
    })
  })
  it('should not contain let on the functionCode', () => {
    const resources = Object.values(SynthUtils.toCloudFormation(stack).Resources)
      .filter((resource: any) => resource.Type === "AWS::CloudFront::Function" )
    resources.forEach((resource: any) => {
      expect(resource.Properties.FunctionCode).not.toContain('let')
    })
  })
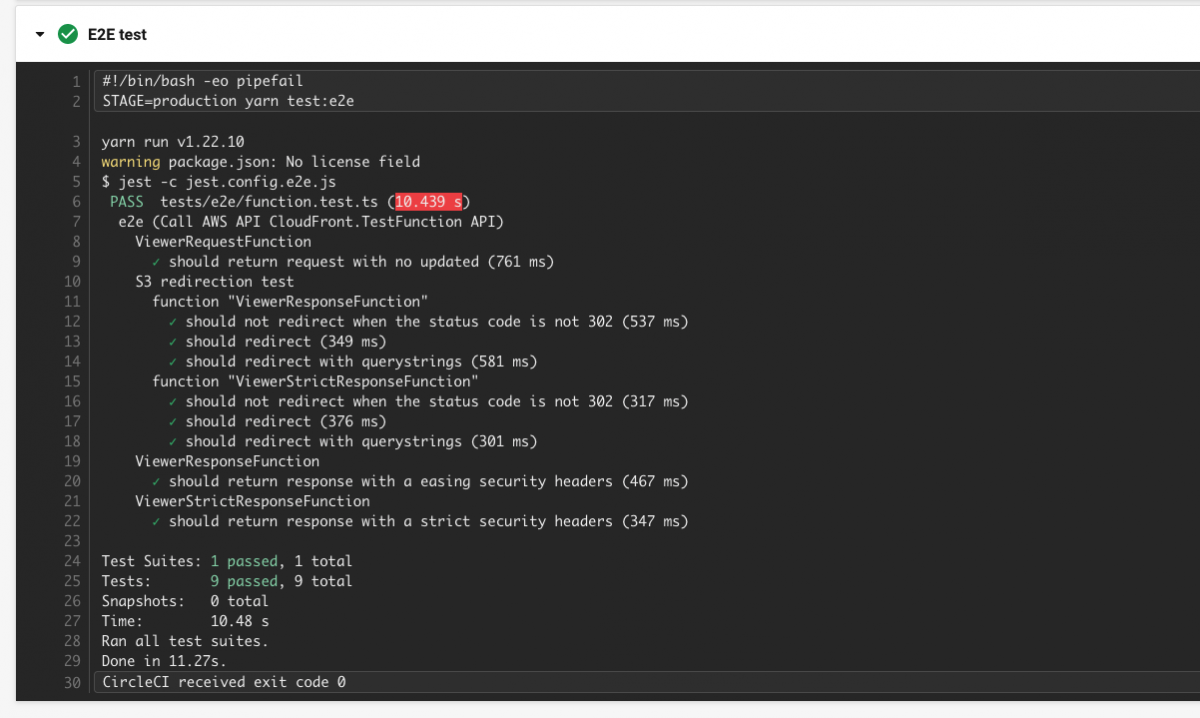
Tips: CloudFront FunctionsのE2Eテスト
CloudFront FunctionsはCloudFront.TestFunction APIを呼び出すことで、実行内容のテストを行うことができます。これを利用し、JestでE2Eテストを実行することを試しました。
import { FunctionTask, TestRequestEventFactory, TestResponseEventFactory } from "cff-tools"
import { ViewerRequestFunction,ViewerResponseFunction } from "../../lib/resources"

describe('e2e (Call AWS API CloudFront.TestFunction API)', () => {


    describe('ViewerResponseFunction', () => {
        it('should return response with a easing security headers', async () => {
            const eventBuilder = TestResponseEventFactory.create()
            const task = new FunctionTask(ViewerResponseFunction)
            const result = await task.runTestToGetFunctionOutput(eventBuilder, 'DEVELOPMENT')
            expect(result)
                .toEqual({
                    response: {
                        headers: {
                          'x-xss-protection': {
                            value: '1; mode=block',
                          },
                          'x-content-type-options': {
                            value: 'nosniff',
                          },
                          'x-frame-options': {
                            value: 'SAMEORIGIN',
                          },
                          'strict-transport-security': {
                            value: 'max-age=63072000',
                          },
                        },
                        statusDescription: 'OK',
                        cookies: {},
                        statusCode: 200,
                    }
                })
        })
    })
})
TestFunctionを実行するためには、CloudFront Functionsが実際に受け取る値と同じフォーマットのデータを渡す必要があります。
{
      version: '1.0',
      context: {
        eventType: 'viewer-request',
      },
      viewer: {
        ip: '',
      },
      request: {
        method: 'GET',
        uri: '/index.html',
        querystring: {},
        headers: {},
        cookies: {},
      },
    }
今回はcff-toolsというライブラリを自作し、このデータを作成するFactoryを用意しました。
      const builder = TestRequestEventFactory.create()
            .setViewerIP('127.0.0.0');
      expect(builder.getEventObject()).toEqual(
        JSON.stringify({
          version: '1.0',
          context: {
            eventType: 'viewer-request',
          },
          viewer: {
            ip: '127.0.0.0',
          },
          request: {
            method: 'GET',
            uri: '/index.html',
            querystring: {},
            headers: {},
            cookies: {},
          },
        })
      );
またAPIのレスポンスについても、ランタイムエラーの場合にErrorをThrowする形に加工するなどの中間処理をcff-tools内に実装し、それを呼び出す形を採用しています。
  public async runTest(builder: TestEventBuilder, stage: FunctionStage) {
    const event = builder.getEventObject();
    await this.function.describeFunction(stage);
    const { TestResult: result } = await this.function.testFunction(
      event,
      stage
    );
    if (result && result.FunctionErrorMessage) {
      throw new Error(result.FunctionErrorMessage);
    }
    return result;
  }

  /**
   * If you want to use the FunctionOutput attribute only, use this
   */
  public async runTestToGetFunctionOutput(
    builder: TestEventBuilder,
    stage: FunctionStage
  ) {
    const result = await this.runTest(builder, stage);
    if (!result || !result.FunctionOutput) {
      throw new Error(
        'AWS API may return unexpected response. Please use runTest instead and handle the response manually.'
      );
    }
    return JSON.parse(result.FunctionOutput);
  }
これらの処理をyarn test:e2eで実行し、CIのPublishFunctionAPIを呼び出すジョブを実行するための前提条件にすることで、Functionsのコードが想定した動き以外の挙動をしていることを検知しています。
終わりに
CloudFront Functionsは、「一度ローンチしたら、あまり頻繁にアップデートを行うことがなさそう」かつ「複数のCloudFrontに対して一気にアップデートを実施する」性質を持つサービスだと考えています。そのため、多少大掛かりではありますが、勘所を忘れるくらい時間が経った場面でも、大事故を起こさないための仕組みとして、今回の構成を考案しました。
AWS CDKのPipeline機能などを利用することで、本サンプルとはまた異なったパイプラインの構築が可能になると思いますので、興味がある方はぜひお試しください。